Focus on quality

Multiple specifications

Manufacturer's direct sales

Support customization

Anti-corrosion

Worry free after-sales service
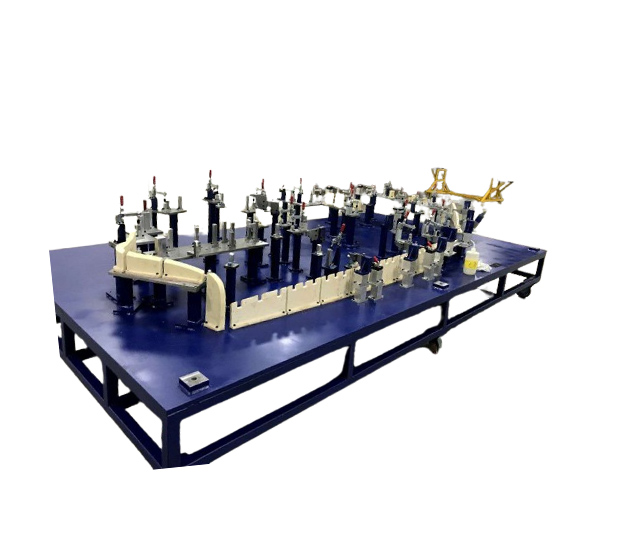
This inspection tool is a side panel assembly inspection tool, and the bottom plate of the inspection tool is welded from steel, with a surface sprayed with off white paint; Spray golden paint on the surface of the base and mark the grid lines of the vehicle body; The detection block is made of alloy aluminum (LY12), and after CNC machining, heat treatment is carried out to eliminate internal stress and improve hardness; The positioning pin is made of steel, and after turning, milling, and grinding, the surface needs to be galvanized and heat treated to increase surface hardness.
The side panel assembly inspection tool records the accuracy and tolerance values of each inspection point in the inspection report.
After passing the three coordinate inspection, the side panel inspection tool needs to be modified, with non machined surfaces painted, labeled, and equipped with accessories. The identification mainly includes: measurement benchmark identification, positioning benchmark identification, measurement device identification, and nameplate of the measuring tool. Attachments should be stored in designated areas, and fixed bolts and pins should be equipped with steel wire ropes with plastic pipes and storage compartments.
After the fixture modification is completed, product trial assembly should be carried out. Place the car side panel into the fixture, check for interference, adjust the bolts and clamping device, and finally check if there are any problems before packing and shipping.


